So many people were dormspired by my last two Dormspiration videos- DIY Dorm Room Decor and DIY Desk Decor– I had to make another one especially since it’s Christmas time and I don’t know about you but I just love the feeling of Christmas in the air. It’s my favourite season and since I am DIY obsessed, why not have fun and make my room all festive and pretty. I hope you enjoy this video.
OH, and one more thing, because I would LOVE to see what you made, you can tweet me or instagram me (both are @theclassyitgirl) with the hashtag #dormingwithroxy I can’t wait to see your DIYs!
1. Wine Glass Candle Holder
Need a candle stand and want to display your pretty ornaments? This little DIY is perfect for you. Fill a wine glass with some ornaments, flip it over and place your candle on top! I used an electric tea light because I’m so careless with candles, it’s not even funny.
2. Hanging Christmas Branch
Literally the most inexpensive DIY ever and it’s so chic and classy it’s hard to believe. But I got you. All you need is a branch-and I painted mine white- some twine/yarn to make two hoops at either end so that it can hang to your command strips (or whatever you use). Then , just pull together a few of your favourite ornaments and hang them onto your branch. Voilà. I hung mine above the ribbon picture frames I made and I absolutely adore how amazing my desk area looks now.
3. Twig Christmas Tree Hanging Ornament
This is one of the simplest ornaments that you can ever make-at practically no cost to you. You need some twigs and just cut them so that they can form a Christmas tree. When you’re happy with it, glue the twigs together. I spray painted mine gold but you don’t have to stop there. You can glitter yours, add buttons, sequins, pearls, and make it as pretty as you’d like. I had a wooden star to top off my tree (I glittered it in gold) but if you don’t have one of these, then you can just add a cute little ornament. Since it’s a hanging ornament, I took a string of pearls and stuck it to the back of my tree. You can use yarn/twine or anything that’s available to you.
4. Christmas Tree Felt Garland
I have realized I have a thing for making garlands. I made these little trees from red felt and I thin that they are the cutest things ever. I snipped a little hole on top and strung them onto my twine which you should NOT use for this DIY because the twine frays and it can tear your delicate trees. That may or may not have happened to me. Here’s where I got the template for these babies.
5. Picture Christmas Tree
I printed 16 pictures to form this wonderful tree. I colour coordinated so I had mostly pastel colours. You can use old Christmas cards or even pictures from a magazine!
6. Starbucks Jars
Starbucks Frappuccino glass bottles have become my latest obsession because there’s no end on how you can use them and the labels are the easiest things to come off. I like using them as jars for the most part and in this DIY, I left them clear because I loved the contrast in my bathroom. I had these gold spray painted leaves and just tucked them in for a chic look. I have them in my bathroom and you won’t believe the difference it has made.
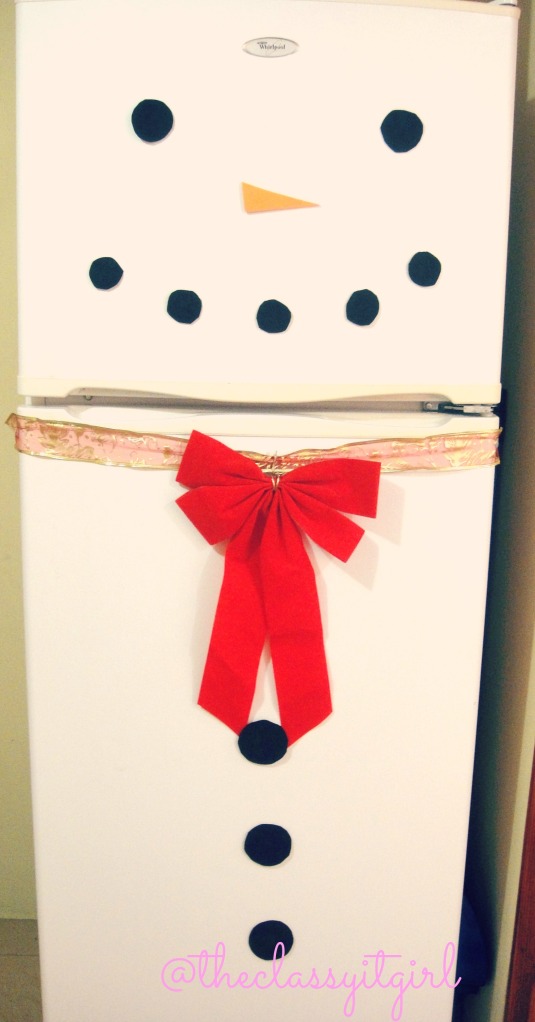
7. My Frosty the Snowman Fridge
This is my favourite DIY in this Dormspiration video. I love him so much and again, it was the easiest thing in the world to make. I used foam for his eyes, nose, smile and buttons. Then for his little scarf, I used red ribbon-but you can use gift paper. I had this random red bow lying around home and it fit perfectly to complete his outfit. And, yes, I do talk to him if you must know.
 8 & 9. Fairy Lights
In my Dormspiration video, I showed you how I hung white icicle fairy lights to my wall of my room as well as around the mirror of my vanity. To make it a little more Christmas-like, I hung these little ornaments and they were just perfect in giving me the feel I wanted. Feel free to hang any other ornaments that you have!
Happy Holidays!
The Classy It Girl!


 -you just need fr
 convenient: everythi

 @harryp



 How:
-cho




 these ar

 Theme: Twinkl
 even th
Leave a Reply